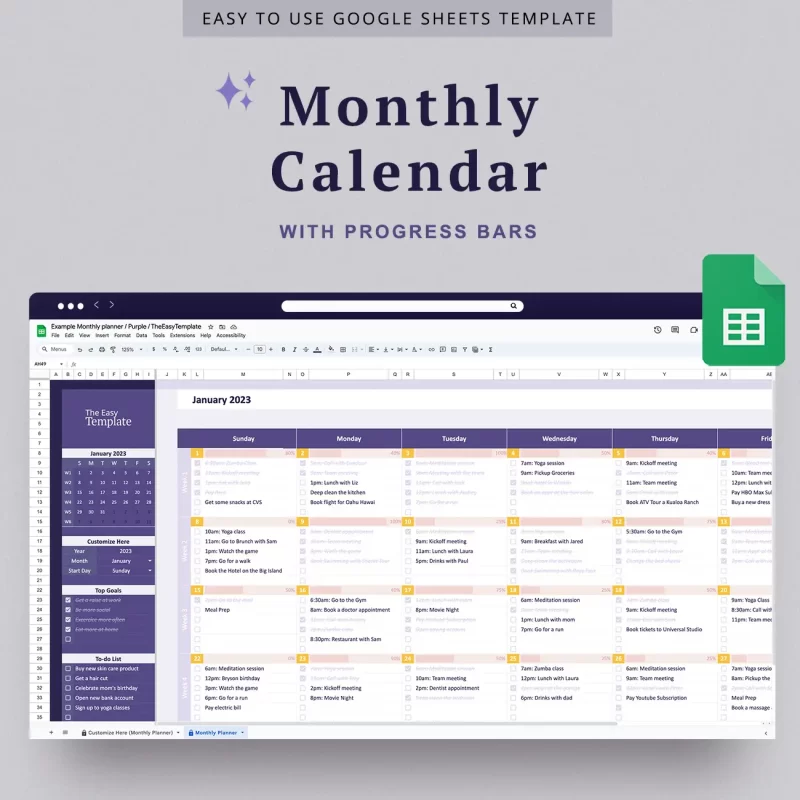
This article assumes you have already purchased the Monthly Productivity Schedule Planner and require guidance on how to set it up. If you haven’t purchased the template yet, you can find more information here.

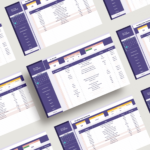
The Monthly Productivity Schedule Planner has different tabs:

The guide below explains how best to populate your data in each tab.

Customize your planner

Be aware that if you change any values in the customize tab, those changes will not be reflected in any drop-down menus that already use those values. You will need to update them manually in other sheets.

You should only edit cells with a white background (n°1-14) if you want to translate your template.

Year

Set the desired year for your spreadsheet.

Start Time

Choose the time you want your day to start.

Month

Select a month from the dropdown.

Start Day

Choose if you want your week to start with monday or sunday

Weekly Planner Categories

Choose your own categories for your planner. Those categories will be used in your daily schedule and in your to-do list.

Translate the month of the year

Translate the month of the year in the language of your choice

Translate the days of the week

Translate the days of the week in the language of your choice

Translate Week 1-6

Translate the numbers of the week in the month that appear in the monthly overview tab.

Translate Monthly Overview Sections

Change the title of the Notes section in the monthly overview

Translate Weekly Planner Sections

Translate the sections of each everyday schedule all at once.

Translate Habit Tracker Sections

Translate the section title of the habit tracker, and choose your streak icon

Translate To-Do List Sections

Translate all of the column titles of the to-do list and of the to-do list dashboard.

Translate To-Do List Priorities

You can translate the priority levels of your to-do list (High, Medium, Low) to any language or replace them by something else.

To-Do List Task Status

You can set up to 20 task status. We started by adding 6 (Open, In Progress, Need details, Review, Hold, Closed), you can either keep them or replace them by something else.

Once you have reached this point, save a copy of this file as your original; this will allow you to skip customized sheets each month. Each month, create a new copy from the original and only change the month (and year if applicable).


Monthly Overview

Here is a spreadsheet to help you plan your monthly schedule. Add appointments to the calendar and create a snapshot of your commitments for the month. Use it as a way to plan your month and stay up to date on what's happening.

You should only edit the white cells (n°1 and n°2). The rest is automated, do not edit the rest of the cells.

Quick Daily Overview

38 daily blocks are available on the calendar. The week begins on Monday or Tuesday, depending on the setting you specify in the Customization page. Your calendar is automatically color-coded—you can easily distinguish between days from past, current, and future months. You can also quickly see today's date so you never miss an appointment!

Notes Section

The monthly calendar has a notes section, so you can either remind yourself of a special event or write an overall review of your month.

Weekly & Daily Schedule

We know that people's schedules vary, so we've made this beautiful spreadsheet template as customizable as possible. You can split up your days and weeks in any way that suits you, and make the details as specific as you like. If you're a morning person, then maybe you'd like your weeks to begin at 5 a.m. on Monday. But if you're more of an owl who doesn't function well before 7 a.m., then maybe it would be better to start your weekdays at 8:30 a.m. Whatever works best for you, this template can accommodate it!

You should only edit the white cells (n°2 and n°3). The rest is automated, do not edit the rest of the cells. If you want to change the time your day starts go back to the "Customize here" tab. 

Time

The daily schedule in your template will begin at the time you set when you customize your template. Every single sheet will update automatically when you change the Start Time in the "Customize Here" sheet.

Category

You can customize the categories you use to plan your week in the "customize here" tab. Once you've set up your categories, you can play around on your weekly schedule sheets by adding colors and merging different cells.

Event

Add a description of what you are doing in your schedule time period. For example, if you blocked 6 to 7 am for a "wellness" category, you might want to add the type of wellness action you took, such as meditation, stretching, or working out.

Current day

The current day will be highlighted automatically. If it doesn't update, just refresh the page.

Digital To-Do List

The To-Do List spreadsheet consolidates all your tasks, and organizes them into three fully automatic dashboards. First, there's a generic to-do list sheet with an overview of your completion rate. Then there's a pending tasks summary dashboard, which includes a filter so you can quickly see what are your priorities for the day. Finally, there's a completed tasks summary dashboard where you can review all of the tasks that you have completed.

Dashboard 1 : To-Do List Database

You should only edit n°5, 6, 7, 8, 9, 10, 11 & 12. The rest is automated, do not edit the rest of the cells or you will break the dashboard.

Total N° of Tasks

Check out how many tasks are on your to-do list for the month.

By Task Completion Status

Have a quick overview of how many tasks you've completed and how many are still outstanding.

Completion Rate

Keep track of your progress with a completion rate percentage and a progress bar.

N° Of Task

Each task has a number associated with it, making it easier to find later on when you are using the other dashboard.

Completed ?

Once you've completed a task, check the checkbox. This will automatically change the color of the task so that you can easily distinguish between those that have been finished and those that are still outstanding.

Category

Organize all your tasks by category. You can define the categories in the "Customize Here" tab.

Task

Describe your task but keep it concise.

Priority

Choose the priority level for each task from the dropdown.

Start Date

Double-click the cell for a calendar to appear if you want to set a start date for the task.

Due Date

If you want to set a due date for the task, double-click the cell for a calendar to appear.

Task status

Choose the task status from the dropdown section. If you want to customize the status go to the "customize here" tab.

Notes

Input additional notes if necessary.

Dashboard 2 : Pending Tasks Summary

You should only edit n°2 & 3 by selecting an option from the dropdown menu. The rest is automated, do not edit the rest of the cells or you will break the dashboard.

Total n° of pending tasks

The number of tasks you have left on your to-do list is automatically calculated. Do not edit it.

Order By

Configure your to-do list according to a specific criterion. You can choose between "priority", "task status", "category", "due date" and "start date".

Highlight filters

Highlight filters allow you to locate a specific task. For example, if you are looking for work tasks with a high priority and a status of "need details," you will know all of the tasks you need to follow up with your manager about during your next meeting.

By Order of priority

See a breakdown of tasks according to priority levels. These are automatically calculated. Do not edit them.

By due date

Take a look at the tasks due more than a week from now, due within the next 7 days, and past due. Those numbers are automatically calculated. Do not edit it.

No matter how you arrange your to-do list, each task's order number will never change. This allows you to quickly go back to the database and find the task, so you can mark it as completed.

Category

Do not edit this colomn directly. To change the category, go back to the main To-Do List and select a different category from the drop-down menu.

Task

Don't edit this column directly. If you want to change the task description, go back to the main database (Dashboard 1).

Priority

Please do not edit this column directly. If you need to change the priority level of a task, go back to the first dashboard.

Start Date

You can view the start date of the task that you had set in the first dashboard.

Due Date

Review the due date that you had set for the task. Do not edit this column. If you want to change it, go back to the previous dashboard.

N° of Days Left Before Due Date

See how many days you have left before the task is due! This column is automated, do not edit it.

Task Status

The Task Status column shows the status that you had set for your tasks in the previous dashboard. Do not change this column.

Notes

Look at any note you added to your task in the first dashboard. Do not edit this column. If you want to edit it go back to the initial dashboard database.

Dashboard 3 : Completed Tasks Summary

You should only edit n°2 & 3. The rest is automated, do not edit the rest of the cells or you will break the dashboard.

Total n° of completed tasks

The number of tasks you have completed on your to-do list is automatically calculated. Do not edit it.

Order by

Configure your completed to-do list's task according to a specific criterion. You can choose between “priority”, “task status”, “category”, “due date” and “start date”.

Highlight filters

Highlighting filters allow you to find a specific task. For example if you are looking for a task in a specific category that was due on a specific date, you can use highlighting filters. Note that for the due date and start date, you have to double-click on the cell for the calendar to appear.

No matter how you decide to arrange your completed tasks with the filter (n°2), the line number you entered the task on the first dashboard will always stay the same. Do not edit this column.

Category

Do not edit this colomn directly. To change the category, go back to the main To-Do List and select a different category from the drop-down menu

Task

Don’t edit this column directly. If you want to change the task description, go back to the main database (Dashboard 1).

Start date

You can view the start date of the task that you had set in the first dashboard.

Due Date

Review the due date that you had set for the task. Do not edit this column. If you want to change it, go back to the previous dashboard.

Completed ?

When you check off a task in dashboard one, that task will automatically go to the completed board and be marked as completed.

Notes

Look at any note you added to your task in the first dashboard. Do not edit this column. If you want to edit it go back to the initial dashboard database.

Habit Tracker Spreadsheet

Improve your life or business with this easy-to-use Google spreadsheet! Simply input your new habit and the frequency you want to track it on. Then each day, check the box and update your overall statistics. This simple tool is a self-help tool that will make achieving any goal easier by breaking down your actions into smaller actions that are more manageable.

You should only edit n°1, 3, 5, 10, 11 & 13. The rest is automated, do not edit the rest of the cells or you will break the dashboard.

Daily Habit

Write down the habits you want to keep track of each day.

Streak

Once you have successfully completed your daily habit for 7 days in a row, a streak icon will appear. You can change the icon in the "Customize Here" tab.

Completed Habit Checkbox

When you accomplish your daily habit, check off the box.

Date

The dates of your habit tracker will automatically update based on the settings you choose in the "customize here" tab.

Daily Goal

Choose from the dropdown section how many days you want to work on your new habit.

Progress bar

The progress bar provides a quick overview of your progress towards your goal. Do not edit this column.

Days Completed

Here you will see the total number of days that you have done your habit. It is automatically calculated, so please do not edit it.

Many of days left to accomplish Goal

This column calculates how many more days you need to do your habit in order to reach your goal.

Mega Streak

The mega streak icon appears once you've checked all the boxes of your habit.

Weekly Habit

Write down the habits you want to keep track of each day.

Week the habit was completed

When you accomplish your weekly habit, check off the box.

Week n°

The columns for each week of the month

Weekly Goal

Choose from the dropdown section how weeks you want to work on your new habit this month.

Progress Bar

The progress bar provides a quick overview of your progress towards your goal. Do not edit this column.

Weeks completed

Here you will see the total number of weeks that you have done your habit. It is automatically calculated, so please do not edit it.

Many of weeks left to accomplish Goal

This column calculates how many more weeks you need to do your habit in order to reach your goal.

Share this post


Related

Posts